
How to Clean the EGR Valve on a Cummins X15 (Step-by-Step Guide)
The process of carbon buildup develops at a gradual rate because it lacks visible signs until it forms a complete blockage of the EGR valve. The X15 engine starts to show problems when the EGR valve becomes blocked because it causes rough idling and excessive fuel consumption and generates a fault code which appears during emergency situations.
The good news for your engine is that a dirty EGR valve does not cause permanent damage. The system requires simple cleaning procedures to restore its proper operation in most situations. The guide provides complete process instructions which help you identify the problem and confirm the solution so you can understand what equipment needs to be used before starting your work.
Signs Your Cummins X15 EGR Valve Needs Attention
Not every performance issue points to the EGR valve, but there are some patterns worth knowing.
Fault codes to watch for:
- FC 3383 — EGR flow insufficient
- P0401 — EGR flow below expected range
- P0402 — EGR flow above expected range
- P0489 / P0490 — EGR control circuit faults
Drivability symptoms:
- Rough or unstable idle, especially when cold
- Sluggish acceleration below 1,500 RPM
- Check engine light combined with higher-than-normal fuel consumption
- Visible black smoke under load
- Engine entering derate or limp mode
If you have access to Cummins INSITE, you can check the EGR valve’s commanded position versus its actual position in real time. A significant gap between the two — say, the ECM is commanding 40% open and the valve is reporting 12% — points directly at a mechanical issue with the valve itself, most likely carbon buildup on the valve plate.
On cleaning intervals: For normal highway operation, Cummins generally recommends inspecting the EGR system around 150,000–200,000 miles. For high-load applications — construction, vocational trucks, frequent stop-and-go — inspecting closer to 75,000–100,000 miles is more realistic. A well-maintained EGR valve on an ISX15 or X15 can last between 500,000 and 600,000 miles, but only if it gets regular attention.
What You Will Need
Gather everything before you start. Having to hunt for a tool mid-job with coolant on your hands is not a good time.
Tools:
- 10mm and 13mm socket set
- Ratchet and extension (3/8″ drive recommended for access)
- Torque wrench
- Flathead screwdriver
- Soft-bristle brush (brass or nylon — not steel)
- Pipe cleaning brush for passage work
- Safety glasses and nitrile gloves
Cleaning supplies:
- Brake cleaner or dedicated EGR/carbon cleaner spray (CRC Intake Cleaner, Liqui Moly Pro-Line Engine Flush, or similar)
- Simple Green (a gentler alternative that works well on aluminum valve bodies and is less aggressive on sealing surfaces)
- Compressed air
- Clean lint-free rags
Parts to have on hand:
- New EGR valve gasket (have one ready — inspect the old one once it is off, replace if there is any sign of damage or compression set)
- Anti-seize compound for the mounting bolts
Step-by-Step: How to Clean the EGR Valve on a Cummins X15
Step 1 — Let the Engine Cool Down Completely
This sounds obvious, but it matters. Exhaust components on a diesel that has been running stay extremely hot for longer than most people expect. Give the engine at least two hours after shutdown before you start work. Burn injuries from EGR components are more common than they should be.
Once the engine is cool, disconnect the negative battery terminal. This prevents any accidental starts or electrical faults while you are working near sensors and connectors.
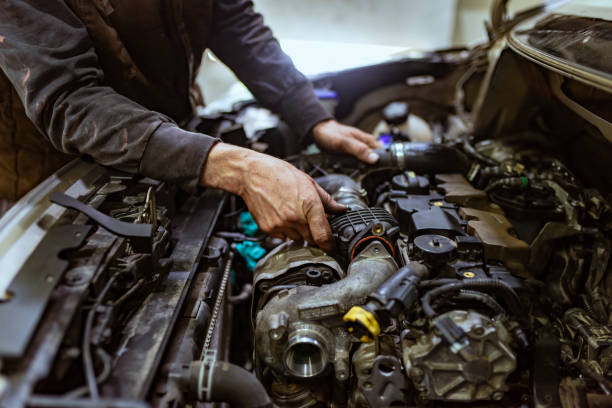
Step 2 — Locate the EGR Valve
On the Cummins X15, the EGR valve sits on the driver’s side of the engine, tucked between exhaust components. Compared to its predecessor the ISX15, the X15 features a redesigned electronic actuator that is somewhat more accessible, but the surrounding pipework still makes it a tight workspace. Take a moment to trace the EGR circuit before you start unbolting anything — identify the valve body, the electrical connector, and the two EGR sensors (differential pressure sensor and temperature sensor) that will need to be unplugged.
You will also need to remove or reposition some intake piping to get clean access to the valve mounting bolts. Some installations require loosening a hose clamp or two; others need a short section of pipe fully removed. Do not force anything — take note of orientation before removing so reinstallation is straightforward.
Step 3 — Unplug the Electrical Connector and Sensors
Locate the main EGR valve electrical connector and press the release tab to disconnect it. Then unplug the EGR differential pressure sensor and the EGR temperature sensor — both connectors are typically nearby and follow the same release-tab mechanism.
Set the connectors aside carefully. These are not parts you want to damage — the sensors themselves can run $100–$200 each, and they are not always easy to source quickly.
Step 4 — Remove the EGR Valve
With the connectors clear, remove the mounting bolts securing the valve to the EGR cooler outlet. There are typically four bolts in a standard pattern. Keep track of which bolt came from which position — some installations use bolts of slightly different lengths depending on location.
Once the valve is off, the best practice is to take it to a clean workbench before disassembling further. Separating the actuator motor from the valve body at the engine is possible, but the risk of dropping small components into hard-to-reach areas is real. Work on a flat, well-lit surface.
Step 5 — Inspect Before You Clean
Before spraying anything, check the valve plate manually. With the valve in hand, try moving the butterfly plate by pushing it gently with your finger. It should move freely through its range of motion and return to the closed position on its own.
If the plate is stuck open and will not move at all, that is a sign the carbon buildup has gone beyond what cleaning can reliably fix, or that the actuator itself has worn out mechanically. In that case, cleaning may still be worth attempting, but set realistic expectations — a replacement may be the outcome regardless.
Also inspect the actuator linkage for any obvious corrosion, cracking, or looseness. A valve body in good condition but with a worn actuator still needs replacement.
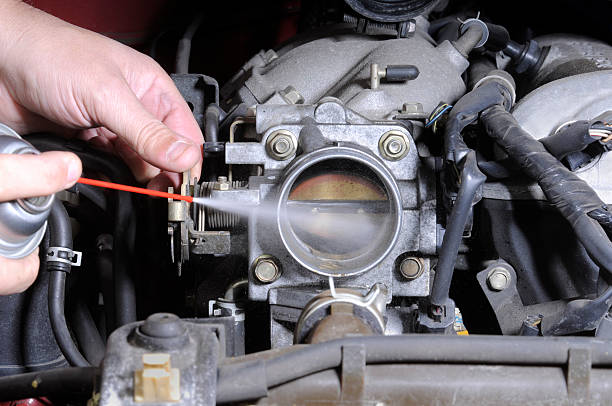
Step 6 — Clean the Valve
Spray the valve plate, valve body interior, and all passages generously with brake cleaner or carbon cleaning spray. Let it soak for a few minutes — the solvent needs time to penetrate the deposits, not just wet the surface.
Use a soft-bristle brush to work loose the carbon deposits. Do not use a wire brush or anything abrasive on the sealing surfaces — scratches create leak points. Never force the valve plate open or closed while cleaning; if the actuator linkage is still attached, you can damage it by applying lateral force to the plate.
Use the pipe brush to clean out the inlet and outlet passages. Carbon buildup inside the passages is just as restrictive as buildup on the valve plate itself, and it is easy to miss if you only clean what you can immediately see.
Repeat the spray-soak-brush cycle until the valve plate moves freely and the passages look clear. Then blow everything out with compressed air and wipe down with a clean rag. The valve must be completely dry before reinstallation — any residual solvent in the passages will cause problems once the engine fires.
Step 7 — Clean the EGR Cooler Inlet While You Have Access
This step adds time, but it is worth doing. Many performance issues that get attributed to the EGR valve are actually caused by a partially blocked EGR cooler inlet or outlet. Since you already have the valve off and the system partially disassembled, checking the cooler inlet costs very little extra effort.
Apply carbon cleaner to the cooler inlet opening and let it soak. For heavier buildup, a longer soak — ideally several hours — is more effective than repeated short applications. Flush with clean water afterward and make sure the cooler is fully dry before reassembly. Residual cleaner left in the cooler can create deposits of its own over time.
Step 8 — Reinstall the EGR Valve
Install the new gasket. Do not reuse the old one unless it is genuinely in perfect condition — gaskets are inexpensive and a failed EGR gasket will send you right back into this job.
Apply a light coat of anti-seize to the mounting bolt threads. This makes future removal significantly easier, especially in high-heat environments where bolts tend to seize over time.
Torque the mounting bolts to specification. Based on community documentation and forum records, the standard torque for Cummins EGR valve mounting bolts is 20 ft-lbs, though you should always verify against the Cummins QuickServe service documentation for your specific engine serial number and model year, as specifications can vary between build configurations.
Reconnect all electrical connectors — the main EGR valve connector, the differential pressure sensor, and the temperature sensor. Confirm each one clicks fully into place. A partially seated connector will throw a fault code immediately.
Reinstall any intake piping that was removed for access and make sure all clamps are properly tightened.
Step 9 — Verify the Repair with Cummins INSITE
Reconnect the battery and start the engine. If fault codes are still present, clear them using your diagnostic tool and allow the engine to run through a warm-up cycle.
If you have access to Cummins INSITE, run an EGR flow test. Monitor the commanded valve position against the actual position — they should be closely aligned. If they are not, and the valve is mechanically clean and free-moving, the issue may be with the actuator or with the ECM needing a parameter reset.
Take the truck on a 50–100 mile road test under normal load conditions. This gives the ECM time to relearn the EGR system’s behavior. Some fault codes will clear permanently after a full drive cycle; others may require a second cycle.
How to Prevent EGR Carbon Buildup Going Forward
Once the valve is clean and reinstalled, a few habits will slow the return of carbon deposits considerably.
Avoid extended idle periods whenever possible. When a diesel idles for long stretches, combustion temperatures drop and incomplete combustion produces more soot — which the EGR system then recirculates. Keeping the engine under load, even moderate load, produces cleaner combustion and less residue.
Periodic long-distance highway runs at sustained load help the exhaust system run hot enough to burn off lighter deposits before they harden. This is not a substitute for physical cleaning, but it does extend the interval between services.
Using higher-quality diesel fuel — particularly fuel with a higher cetane rating — produces cleaner combustion and measurably less soot over time. If your operation has flexibility on fuel sourcing, this is worth factoring in.
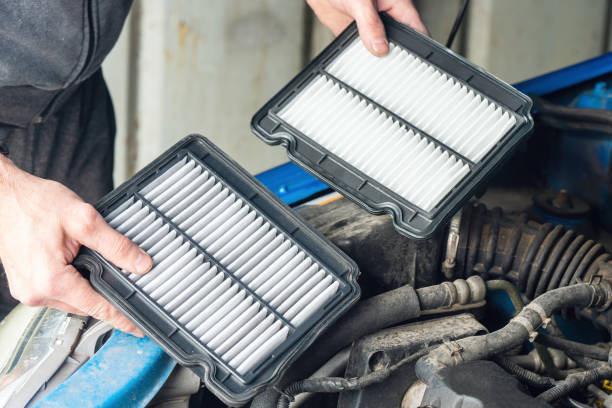
Finally, stay current on air filter replacements. A partially blocked air filter restricts intake flow, which shifts the combustion characteristics in ways that accelerate carbon deposits throughout the intake and EGR system.
If you need any Cummins-related accessories, please contact Longshine.