
How To Change Water Pump On 6.7 Cummins?
If your 6.7 Cummins engine suddenly overheats, the water pump makes abnormal noises or the coolant drops for no reason, the water pump might be the culprit. For many car owners, going to a repair shop means a considerable amount of money and waiting time. The good news is that if you have a certain level of hands-on ability, replacing a water pump is not complicated and can also save a considerable amount of labor costs.
This blog will guide you step by step through the 6.7 Cummins water pump replacement process, focusing on the issues that users care about most and the potential pitfalls they may encounter, helping you complete this task efficiently and safely.
Why Is It Necessary To Replace The Water Pump?
Before starting the operation, first confirm whether the following phenomena have occurred:
- Coolant leakage, especially dripping from the front of the engine
- The engine temperature rises, often approaching or exceeding the normal range
- It emits high-frequency abnormal noises, especially during acceleration or cold start
- There are signs of loosening of the water pump shaft or sliding of the belt
If you encounter these situations, it’s very likely that the water pump is approaching the end of its service life and it’s time to consider replacing it.
Prepare The Tools And Materials
You don’t need a full set of maintenance equipment, but the following tools will make the whole process smoother:
- Socket wrenches and ratchets
- Torque wrench (used to ensure uniform tightening force)
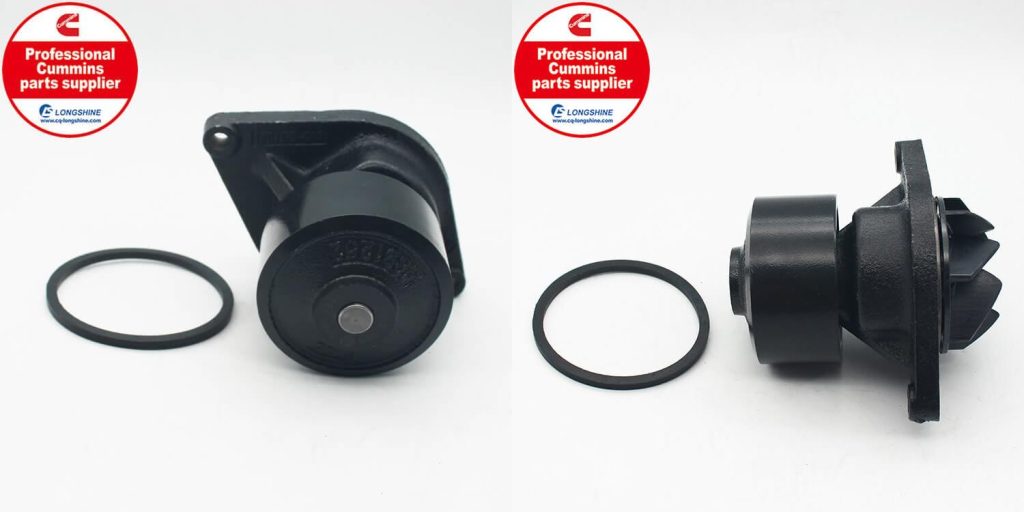
- New water pump and gasket (OEM or high-quality aftermarket parts are recommended)
- Sealant (required for some models)
- Drain the bucket
- New coolant (It is recommended to purchase the appropriate formula in advance)
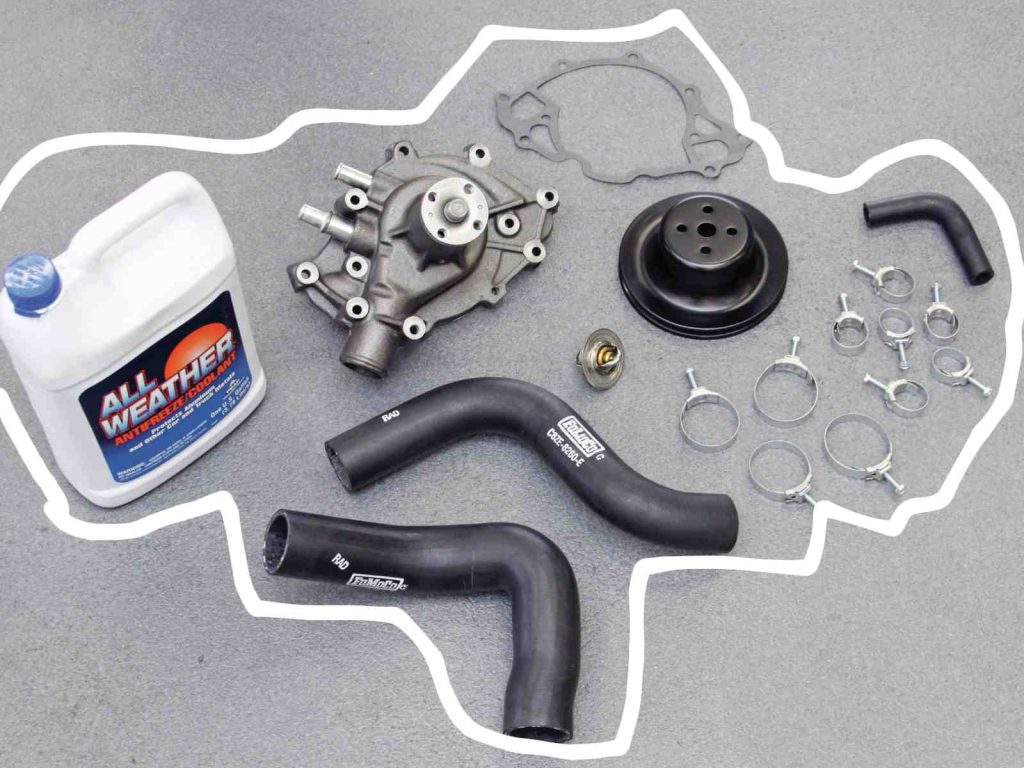
In addition, some cleaning tools and old towels are also very practical, used to clean up leaks or residual liquids and keep the working area clean.
Although the preparation stage is simple, it directly affects the smoothness of the subsequent process. Once tools and parts are missing, it is very easy to get stuck at critical moments.
Preparations Before Disassembly
- Power-off handling: First, disconnect the negative terminal of the battery to ensure that the operation process does not cause a short circuit in the circuit.
- Drain the coolant: Locate the drain bolt at the bottom of the radiator, carefully unscrew it, and let the old coolant flow into the drain bucket.
- Check the space: Ensure that the working space is sufficient. Remove obstructing components such as fan guards or air intake pipes if necessary.
Many people would ask: “Can coolant be reused?“
It is recommended to replace it with a new one. The performance of the old liquid has significantly declined after a long period of heating and circulation.
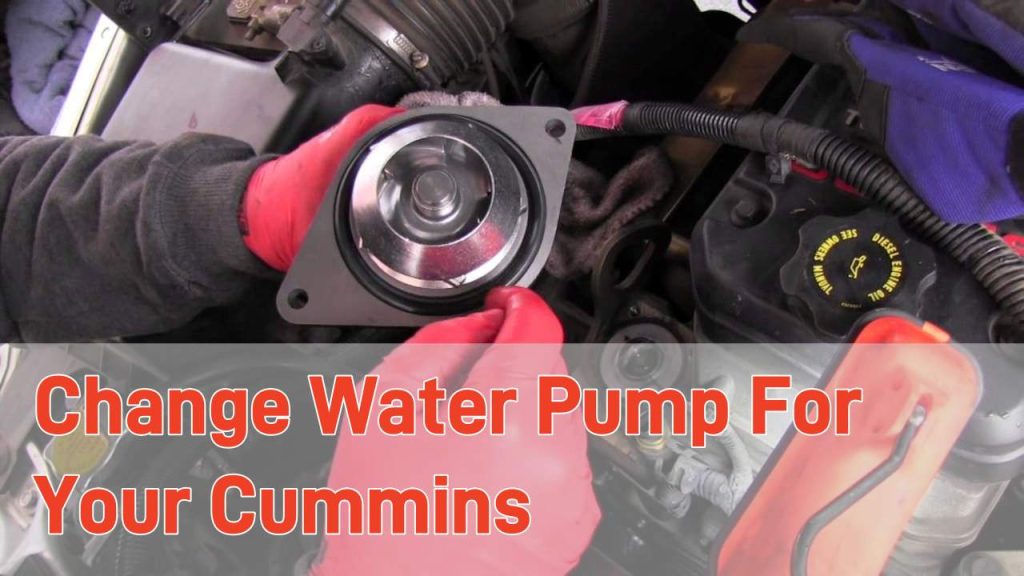
Disassemble The Old Water Pump Correctly
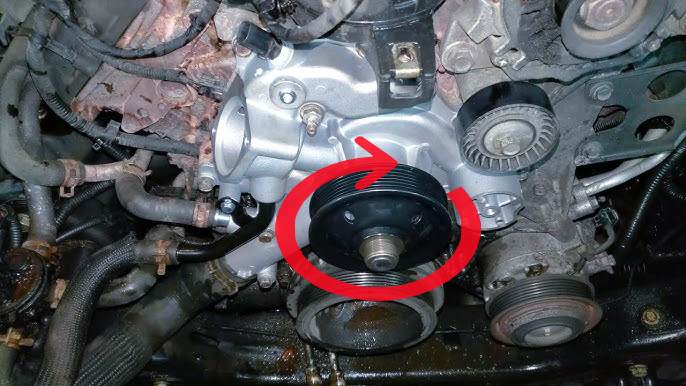
- Remove the fan and belt system: Loosen the tensioner pulley and remove the serpentine belt. Depending on the model, the fan may also need to be removed.
- Loosen the fixing bolts of the water pump: Loosen the screws in diagonal order to help reduce the risk of deformation.
- To disassemble the water pump body: Gently pry the edge of the water pump, being careful not to damage the installation surface.
If the water pump cannot be removed, first check if there are any hidden screws. Sometimes rust or overly thick sealant can also cause it to get stuck.
Precautions When Installing a New Water Pump
Clean the contact surface: Use a scraper and cloth to thoroughly remove any residue from the old sealing gasket to ensure that the new pump can fit completely.
- Install a new gasket: Place the gasket correctly as per the instructions. If necessary, apply a thin layer of sealant (depending on the specific model).
- Tighten the bolts: Use a torque wrench to tighten them one by one according to the recommended values to avoid excessive force which may cause the screws to break.
When installing the water pump, remember to tighten it in a diagonal sequence. This can ensure that the sealing gasket is evenly stressed and prevent leakage in the future.
Restore The System And Complete The Inspection
- Reinstall the belt, fan, guard cover and other components
- Add coolant and perform system exhaust before starting the engine
- After starting, let the engine idle and observe whether there are any abnormal phenomena such as coolant leakage or abnormal noise from the water pump
- Check if the water temperature on the dashboard is normal and make sure there are no alarm lights
If overheating still occurs after replacement, it might be due to problems with other parts such as the thermostat or clogged water pipes. Don’t rush to judge the quality problem of the water pump. First, check them one by one.
Common Problems And Troubleshooting Suggestions
Is there still a water sound after installation?
There may still be air in the system that has not been discharged. Repeat the exhaust operation.
Abnormal noise from the water pump?
Check if the belt tension is correct or if the belt is aged and causing slippage.
Coolant leakage?
It might be that the gasket was not installed properly or the seal was poor. It is recommended to recheck the sealing surface.
Final Thoughts
For 6.7 Cummins users, replacing the water pump is not just a repair but an opportunity to understand their vehicle’s system. If you have reached the point where you need to replace the water pump, you might as well consider doing it yourself. As long as you are well-prepared and the steps are clear, this job is not much more difficult than changing the engine oil.
And you will no longer be merely a driver, but the master of your own vehicle.